Tuesday, April 24, 2012

Easy Quinoa Primavera

I got the idea for this recipe from my sister and her husband.  They had it last week for dinner and my sister mentioned to me how good it was.  I'll admit that I had never heard of it before, but it sounded good!   I like quinoa and just bought a new package from the store, so I threw this together tonight using the vegetables I had in my fridge.  It was very easy to prepare and was a nice change from pasta. 


Quinoa Primavera
(serves 4)
Ingredients
2 tbsp extra virgin olive oil 
2 cups cooked quinoa
1 cup onions, chopped
3 garlic cloves, minced
1.5 cups asparagus, cut into 1 inch pieces
1.5 cups carrots, shredded
1 cup peas
1/4 tsp pepper 
salt to taste
*1 tsp lemon juice (optional)

*I added 1 tsp of lemon juice to the portion on my plate, not while it was cooking.  It's optional but does add a nice, refreshing flavor!


Directions:
Chop onions & asparagus, shred carrots and mince garlic; set aside.

Prepare quinoa according to package directions.

While quinoa is cooking, heat 1 tbsp olive oil over medium heat in 4.5 quart pot.   Add onions & garlic and saute for about 5 minutes.  

Reduce heat to med-low, add asparagus, carrots salt and pepper.  Pour remaining tbsp of olive oil on top and stir to combine. Cover and cook for 8 minutes. 

Reduce heat to low, add peas and stir to combine, and cook for 2 more minutes.  

Add cooked quinoa to sauteed vegetables and mix.


I should note that I don't typically like to cook with oil, but I make exceptions sometimes.  I felt that if I sauteed the veggies in water like I normally do, it would take away from some of the flavor of this dish. It turned out very good, and was the perfect light dinner for a spring night!


Sunday, April 22, 2012

Maple Walnut Waffles w/Banana Soft Serve

If you've been reading my blog for a while, you might remember this post where I said I wanted to experiment with breakfast more.  Yeah, that hasn't really happened.... until today that is!  When I first got my waffle iron I made waffles quite a bit.  I guess somewhere along the line the newness wore off and back it went into the pantry closet to collect cat/dog hair dust.  ;-)   

I decided to make some waffles this morning after I remembered how yummy they used to be when I topped them with banana soft serve in place of maple syrup.   You can prepare the soft serve ahead of time and let it sit in the fridge while you make the waffles.  


Banana Soft Serve

(yields about 1 cup)
Ingredients
2 frozen bananas
1 tsp vanilla extract
touch of water


Directions:
Place bananas, vanilla and a touch of water into food processor.  Blend, adding as much additional water as you like to achieve desired "soft serve" type consistency.

I got the inspiration for the waffle recipe here.  I adapted it quite a bit.


Maple Walnut Waffles
(yields about 8 waffles)
Ingredients
1 1/2 cups rice milk
1 1/2 tbsp apple cider vinegar
2 tbsp ground flaxseed + 6 tbsp water
2 cups unbleached white whole wheat flour
1 1/2 tsp baking powder
1/2 tsp baking soda
1/4 tsp salt
1/2 cup maple syrup
1/3 cup unsweetened apple sauce
1/2 cup walnuts, chopped
1 banana, sliced (optional)


Directions:
Prepare waffle iron according to manufacturer's instructions.

For "buttermilk": Combine rice milk with apple cider vinegar.  Stir and let sit to curdle while you prepare the rest of the ingredients.

For "flax eggs": Combine flaxseed with water, stir to combine and let it sit to thicken.

In a large bowl, combine flour, baking powder, baking soda and salt.

In separate bowl, combine maple syrup and applesauce.  Add to dry ingredients, followed by the curdled milk and flax egg mixtures.  Stir until ingredients are combined and a light batter is formed.

Add walnuts and stir to combine.  Make each waffle by pouring about 1/4 cup of batter onto the center of the waffle iron.  Bake according to manufacturer's instructions.


You can top these with traditional maple syrup if you wish, but since the waffles already contain maple syrup, the banana soft serve helps prevent 'maple syrup overkill' (if you believe in such a thing ;-)), and it really adds a nice flavor!   Top with sliced bananas, or other types of fruit, if you wish.


These waffles don't really stay very "crisp" for long, I'm not sure why that is.  I've yet to make waffles that stayed crisp like the store bought freezer ones I used to eat.   Maybe it's the lack of preservatives?  No worries, though.  You can just pop them into the toaster oven to crisp them up if they've been sitting around for a bit and lost their crunch.  You can freeze any remains for future use!

As for the soft serve, I'm not sure how much topping you like on your waffles, but I'd say that the cup of banana soft serve is good for about 3-4 waffles.  


Enjoy! :-)


Friday, April 20, 2012

Peanut Butter Banana Bread

I recently came across this recipe while searching for bread recipes. Not quite the bread I originally had in mind to make, but my uncontrollable urge to satisfy my sweet tooth got the best of me. The title alone was enough to convince me to give it a try.  Imagine my excitement when I read the list of ingredients and realized it also contained chocolate chips! :-) I could already imagine just how good this was going to taste.

The original recipe contains refined sugar, which of course I wanted to replace.  I used maple syrup instead and was able to reduce the amount of overall sugar by 1/4 cup.  This is also oil free!


This recipe is adapted from Eggless Cooking:

Peanut Butter Banana Bread
Ingredients
1/2 cup rice milk
1 tsp apple cider vinegar
1 1/4 cup organic pastry flour 
1 tsp baking powder
3/4 tsp baking soda
1/4 tsp salt
1 cup mashed banana (2 medium bananas)
1/3 cup peanut butter
1/2 cup maple syrup
1 tsp vanilla
1/2 cup chocolate chips


Directions:
Preheat oven to 350 and lightly grease an 8x4 inch loaf pan.  


In a small bowl, mix rice milk and cider vinegar and set aside so the mixture can curdle (about 5 minutes).


In a large bowl, combine flour, baking powder, baking soda and salt.


In a separate bowl, combine mashed banana, peanut butter, maple syrup, curdled milk mixture and vanilla.


Add wet ingredients to dry ingredients and mix until combined.   Stir in the chocolate chips.


Pour batter into prepared pan and bake for 45-50 minutes, or until a toothpick comes out clean when inserted into the center.    Place on wire rack and cool for 15 minutes.


There was no one flavor that overpowered the bread, it was a nice blend of peanut butter, banana and chocolate.  It came out super moist and delicious!  My sister said, and I quote, "My favorite part was the chocolate chips!".  I couldn't have said it better myself! :-)  I actually made this about a week ago and she was wondering why I hadn't posted the recipe yet.  Well, here it is! 


My cat Sam was watching the whole process from his new favorite spot.  I wonder what he's thinking?

I bet he's thinking "that smells good!"


Meow! =^..^=

Wednesday, April 18, 2012

Carrot Cinnamon Muffins

There is a fabulous healthy eating blog I follow called Nurturing Naturally.  The blog authors recently came up with the idea for a "Recipe Test Tuesday".  They will post a recipe on their blog (and link it to Facebook if you're on there) and if it looks like something you'd like to try out, you make the recipe and then report back with your thoughts.  It's a great way to test out new recipes and get to know more people who also enjoy cooking/baking!  

I'm excited to be a part of this, as I love trying new recipes and getting to know more like-minded people.  The first recipe they posted was for Gluten Free Carrot Cinnamon Muffins.  Since the original recipe was already dairy-free, it was pretty easy for me to make it vegan.  I actually enjoyed the challenge of not only subbing out the eggs, but also making this refined-sugar free.  I went through my vegan substitutions cheat sheets, put my thinking cap on, and got to baking!

Here is my adaptation (the original recipe can be found here):

*Please note that my version is not Gluten-free, but it is refined sugar & oil-free).  I will discuss my substitutions below.

Carrot Cinnamon Muffins
(yields 12 muffins)
Ingredients
1 1/4 cup Unbleached White Whole Wheat Flour
2 tbsp milled/ground flaxseed
1 tsp cinnamon
1 1/2 tsp baking powder 
1/2 tsp baking soda
1/8 tsp salt
1/2 cup unsweetened applesauce 
3/4 cup Organic, Grade B maple syrup
2 cups finely grated carrots

Directions:
Preheat oven to 350 degrees.  Grease a muffin tin, or line it with baking cups.

Mix together the flour, flaxseed, cinnamon, baking powder, baking soda and salt.

In a separate bowl, mix together the applesauce, maple syrup and grated carrots. 

Mix the dry ingredients with the wet ingredients until just combined.   Spoon batter into muffin tin.

Bake for 20-22 minutes, until a toothpick inserted in the center comes out clean (mine took 21 minutes).   Cool in muffin tin for 15 minutes, then transfer muffins to a wire rack to cool slightly before serving.

Excuse me while I devour one...or two.... YUM!! 
I almost couldn't get through this picture without finishing the half-eaten one :-)

I'd like to discuss my substitutions since you might be visiting me from Nurturing Naturally and want to know the "whats and whys" behind my recipe adaptation.

First, I didn't use gluten-free flour because I didn't have any on hand.  I was therefore able to eliminate the need for Xanthan gum since I read in the comments section in the original recipe link (here), that it's used to give gluten flour more of a regular flour type consistency.

Second, since I'm vegan, I wanted to use an egg substitute.  There are many options for that, but I settled on applesauce.  I typically use a "flax egg substitute" (1 tbsp flax + 3 tbsp water), but this recipe already contained flax so I wanted to try something different. Besides, the thought of applesauce in a carrot cinnamon muffin just sounded right! :-) You can use 1/4 cup of applesauce per egg.  You'll want to increase your baking powder by 1/2 tsp to help obtain a lighter texture in your baked goods though. 

Third, I like to stay away from refined sugar whenever possible so I typically use maple syrup in my recipes.  Substituting liquid sweeteners for regular sugar can be tricky.  You can do it cup for cup, but you want to make sure that you either a) decrease other liquids by 1/3 cup, or b) increase your flour by 1/4 cup.  Since I used maple syrup, I eliminated the 1/3 cup Rice Milk from the original recipe.

Dry ingredients

Wet ingredients 

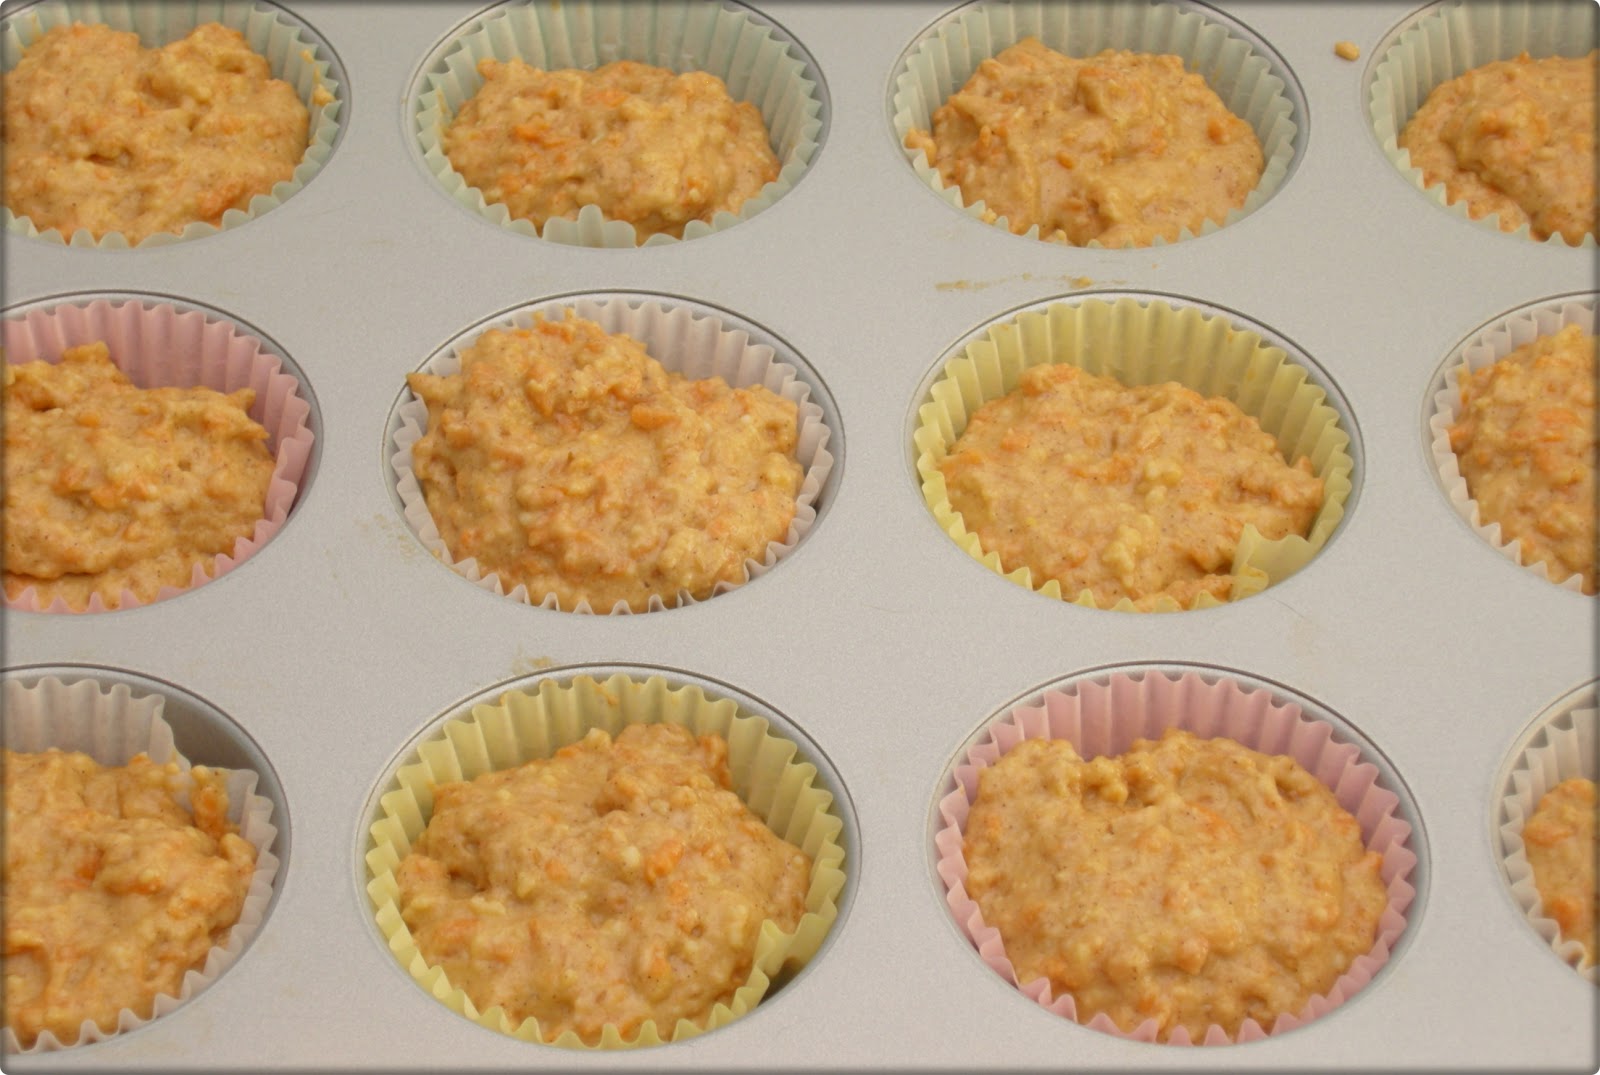
Muffins before baking

Muffins after baking

These turned out melt-in-your mouth moist and delicious!  


Happy baking!

Thursday, April 12, 2012

Pasta w/Creamy Sauce

I've been wanting to try and make my own pasta sauce for a while now.  I thought I would just make your basic pasta sauce with added veggies & spices.  However, lately I've been dying to try something creamier or cheesier, like so many vegan pasta dishes contain that I read about.  My only problem with most recipes I've come across, whether just to make a creamy sauce or cheese sauce, is that they contain Nutritional Yeast (aka: "nooch").  It's high in protein and B vitamins making it pretty popular among vegans.  It also has a creamy, cheesy flavor that makes it a great cheese substitute.  However, my problem with it is that it also contains high levels of free glutamate from its processing.  I only tried nutritional yeast once and had a bad reaction, similar to how I would feel if I had consumed MSG. Therefore, I avoid it.

Thankfully, I read recently that using ground mustard is a good way to spice up, or add a nice kick and unique flavor to several dishes, included sauces.  Typically, it compliments cheese (or nutritional yeast) in recipes. Since I already had a basic idea on how to thicken up sauce, I thought I'd experiment and see what I could come up using just ground mustard, minus the "nooch".  I couldn't be happier with the thickness and taste of this sauce!  This is a very basic recipe with a whole lot of flavor!  

Pasta w/Creamy Sauce
Ingredients
2 cups marinara sauce
3/4 cups cashews
1/4 cup rice milk
1 tbsp ground mustard
salt & pepper to taste
16oz fusilli pasta (or pasta of choice)
2 cups frozen peas

Directions:
For "Creamy Sauce":
Place marinara sauce, cashews, rice milk, ground mustard, salt & pepper in food processor and blend until smooth and thick.  Pour sauce into medium pot and heat over medium-low, stirring often until heated through.
*This recipes yields about 2.5 cups of sauce.  Feel free to make more if you like a lot of sauce.  I found it to be just enough for our liking.

For Pasta & Peas:
While the creamy sauce is heating up, prepare pasta according to package directions.

Towards the end of the pasta cooking (with around 8 minutes remaining), add peas and 1/4 cup of water to small pot.  Bring to a boil, cover and reduce heat to low.  Simmer for 5 minutes, until peas are bright green and softened.   If any water remains, drain.

Top pasta with creamy sauce, then add the peas.   Then say "yum!" :-)

Creamy Sauce simmering in the pot

Pasta Dish "before"

Pasta Dish "after" :-)

I hope you enjoy this as much as I did!